If the end of the world is coming and you’re facing the zombie apocalypse, you are going to need to have antibiotics in your survival kit. If you’re the first survivor to hit a drugstore, you might be able to clean them out of their antibiotic inventory. Antibiotics are the most sought-after ingredient in the apocalyptic survival strategy. This could be a no-thing for you if you can make your own antibiotic on demand. Sounds impossible at first but when you realize that colloidal silver is a powerful broad-spectrum bactericide that can be easily made from scratch, that is when you can check it off your list, with the confidence that if you had to, you could make your own colloidal silver antibiotic, when you need it.
That assumes that you prepare for it. There are kits on Amazon, like this one. There’s nothing to fear, as making your own colloidal silver water is not as challenging as a middle school science fair project.
To do it yourself, you will need some basic ingredients to make sure that you have everything that you will need to create colloidal silver and keep these items bundled together in your colloidal silver kit. And you should practice making it before you need it so that you can rely on your own proficiency when the time comes.
The Make Your Own Colloidal Silver Antibiotic Kit
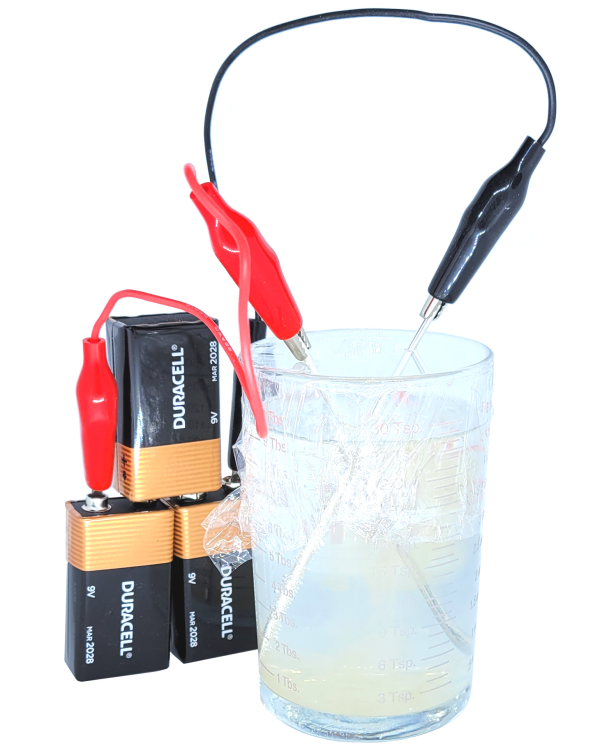
You can create colloidal silver by using silver wire, a battery source, and liquid. The silver wires will sit on a container of water.
Silver particles will shed when electricity runs between the silver pieces.
Required Materials
In order to produce colloidal silver, only a few basic materials are needed.
- Batteries
- Water that has been distilled
- Wire made of silver
- Diodes
- (2) Containers
- Alligator clips
- Silver and power source
- You may choose less expensive batteries if you’re planning to use a small amount of colloidal silver. Use lithium batteries if you plan to use the device for a longer period of time.
- To connect the batteries to the silver wire, you will need lead wires and alligator clips.
- Buy the purest silver wire you can find. Don’t use sterling or plated silver.
Silver bullion is used instead of silver wire by some people who don’t trust silver wire.
Current Regulation Diode
Using diodes, you can regulate and control the current flowing between the silver wire or bullion.
Water does not possess a high level of conductivity, but silver does. The water will conduct silver as it sheds from the wire, and as the current increases, the silver will become more significant.
The larger the silver particle, the less effective it is at removing bacteria and pathogens from the body. You may also be at a higher risk for Argyria.
This issue can be addressed with a regulator diode.
Choosing a diode that can maintain a current of less than one milliampere will prevent the current from increasing beyond a certain point.
Use water that has been distilled
You can purchase distilled water from convenience stores or grocery stores. It contains very few particles or impurities.
Learn how to make distilled water if you don’t trust ready-made distilled water.
Two containers
This improvised colloidal silver machine requires one or two containers. One container will hold distilled water, and it should be made of glass or plastic.
It is safer to use glass for this experiment. Be sure to use a container specifically designed for making colloidal silver. Do not use a container that has been used for something else in the past.
Remember these tips
- Keep your colloidal silver away from light in an amber-colored or non-translucent container.
- Online or in-store, DIY colloidal silver containers should be easy to find.
Making Colloidal Silver at Home DIY
- In order to connect batteries in a series, attach the positive terminal of one battery to the negative terminal of another. You should have a positive terminal on the left and a negative terminal on the right.
- At the end of your clip for the negative terminal, connect your diode. Then, connect another alligator clip to the other side of your diode.
- Put the silver pieces in the water, ensuring they rest on the bottom and side of your colloidal silver container. However, do not allow them to touch. This will cause a short circuit.
- Make sure you don’t let anything else enter your distilled water, including alligator clips.
Getting Started with Your Experiment
In your first DIY colloidal silver experiment, pay attention to the water and see what happens. Usually, it will take a couple of hours for the silver particles to start saturating the water.
The water turns yellowish first.
It won’t take long for your colloidal solution to finish after a few hours.
You can set an alarm next time.
Pour your solution into one of the amber-colored containers you set aside earlier when you’re done with your first batch.
Colloidal Silver Solution Use
That’s it! You’re done with your experiment.
The best way to use colloidal silver is to use it sublingually. Some people try ingesting it, but this isn’t necessary since 90% of the silver will be flushed out.
Silver can be swished around in your mouth for about 10 minutes, and you won’t have to worry about silver deposits in your body. It can also be applied to wounds as a disinfectant.
Tips and additional materials
Monitor the density of your colloidal silver solution using a handheld laser. These can be found easily in most supply shops. After about 30 minutes, you should be able to see the progress of your solution.
Stir your solution occasionally with a wooden spoon.
You may also need a wooden board to hold the wires on top of your glass jar. Avoid metal, since it will shortcut your circuit.
To keep the silver wires from falling into the water, use any small cutting board in your home that has two holes in the middle at least one inch apart. Attach an alligator clip to the end of every silver wire to keep it from falling.
The other end of the wire goes through the hole in the wood before going into the water. This holds the wires in place while the wooden board sits on top of the jar.
To learn about ways to purify your water, check out this article on water purification. Use distilled water for this project!
In normal water, impurities can bind to silver, causing Argyria, a condition where the skin becomes blueish-grey and irreversible.
Over the Counter Silver Water
I, like many people. prefer to get my silver water from a reliable professional source. The highest quality I have found for myself is Wayne Rowland’s Silver Water.
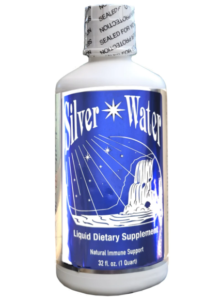
Silver Water has been around for years and is made with his unique Tesla lightning equipment that reduces particle size and infuses the silver water with the three musical notes that make up the Bb chord. Some people report that it has only the one note, Bb, but it actually has three musical notes infused via the Tesla gear: Bb, D, and F. I love it, and there’s nothing else like it.
But I also have several DIY colloidal silver water kits, so that I know that if the SHTF or for any other reason, I am unable to get Wayne’s Silver Water, or anyone else’s, I will be able to make my own. If nothing else, to make colloidal silver myself and use it as an antibiotic so that I don’t have to worry, even if I find myself in the middle of a zombie apocalypse.
Tips for Colloidal Silver Safety
Please do not use any other chemicals or ingredients, including salt, in this project.
In the water, do not put anything at all.
For external purposes, including house cleaning and disinfection, tap water can be used to create colloidal silver, but not for ingesting.
Silver colloidal should not be refrigerated.
Colloidal silver may also kill friendly bacteria, so you may want to follow the use of it with supplements, such as lactobacillus acidophilus or yogurt.
Before consuming colloidal silver, consult your physician first. This post only discusses homemade colloidal silver and is not intended to be medical advice.